---
title: Source
sidebar_position: 3
description: Comprehensive guide to install the OpenBB Terminal and SDK from source.
The guide covers the installation process for Windows, macOS, and Linux systems
and covers various software installations including Miniconda, Git, Microsoft C++
Build Tools, Rosetta2, LibOMP, VcXsrv, and GTK toolchains. Instructions for environment
setup and package management through Conda and Poetry are also included, along with
troubleshooting tips and community support.
keywords:
- Installation
- Miniconda
- Git
- Microsoft C++ Build Tools
- Rosetta2
- LibOMP
- VcXsrv
- GTK toolchains
- Conda
- Poetry
- Environment setup
- Python package management
- Troubleshooting
- Community support
- Linux
- MacOS
- Windows
---
import HeadTitle from '@site/src/components/General/HeadTitle.tsx';
:::warning
The instructons on this page are for installing the OpenBB Terminal from the source code, which uses a legacy version of the Python SDK. If you do not wish to install the OpenBB Terminal application, please refer to the installation instructions [here](/platform/installation)
:::
This section provides steps to install the OpenBB Terminal and SDK from source. This installation type supports Windows, macOS and Linux systems. **Before starting the installation process, make sure the following pieces of software are installed.**
Miniconda
Miniconda is a Python environment and package manager. It is required for installing certain dependencies.
Go [here](https://docs.conda.io/en/latest/miniconda.html#latest-miniconda-installer-links) to find the download for your operating system or use the links below:
- Apple-Silicon Systems: [Miniconda for MacOS](https://repo.anaconda.com/miniconda/Miniconda3-latest-MacOSX-arm64.pkg)
- Intel-based Mac Systems: [Miniconda for MacOS](https://repo.anaconda.com/miniconda/Miniconda3-latest-MacOSX-x86_64.sh)
- Linux and WSL Systems: [Miniconda for Linux](https://repo.anaconda.com/miniconda/Miniconda3-latest-Linux-x86_64.sh)
- Raspberry PI Systems: [Miniconda for Raspberry PI](https://repo.anaconda.com/miniconda/Miniconda3-latest-Linux-aarch64.sh)
- Windows Systems: [Miniconda for Windows](https://repo.anaconda.com/miniconda/Miniconda3-latest-Windows-x86_64.exe)
To verify if Miniconda is installed on the system, open the command line and run the following command:
```shell
conda --version
```
If Miniconda is installed, a version number will be displayed, for example:
```shell
conda 23.1.0
```
There is a good chance the version of Conda is not current. Update it with the command below:
```shell
conda update -n base -c conda-forge conda
```
Git
Check to verify if Git is installed by running the following command:
```shell
git --version
```
Which will print something like this:
```shell
git version 2.31.1
```
If Git is not installed, install it now from `conda` by running:
```shell
conda install git
```
Or follow the instructions [here](https://git-scm.com/book/en/v2/Getting-Started-Installing-Git) to install it.
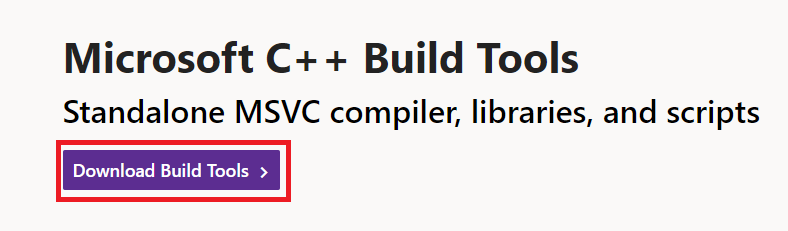
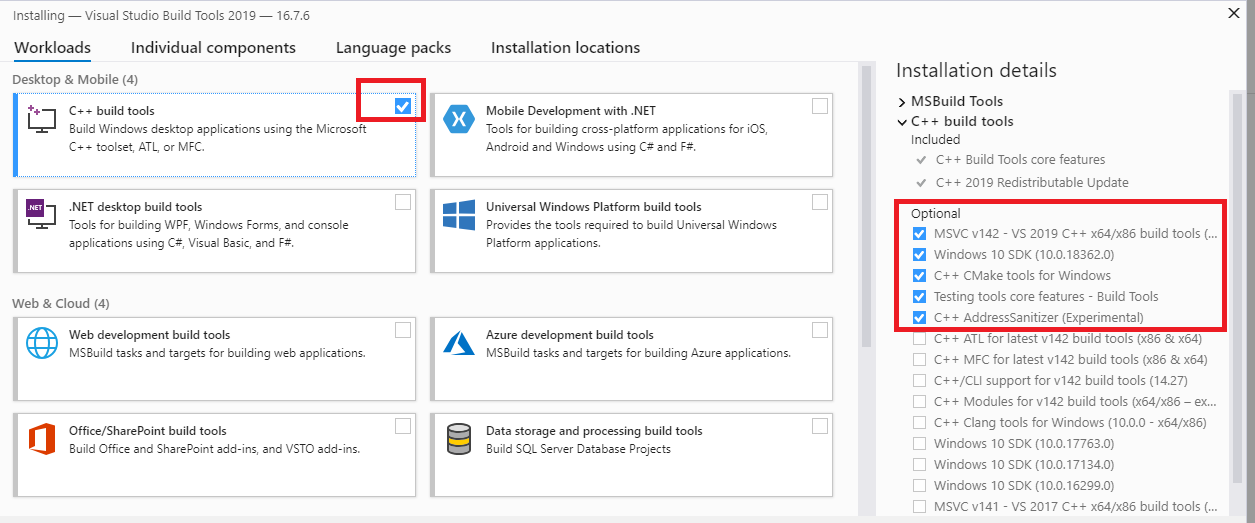
Microsoft C++ Build Tools (Windows only)
Use the instructions [here](https://visualstudio.microsoft.com/visual-cpp-build-tools/) to install or update Microsoft C++ Build Tools.
Rosetta2 (Apple Silicon only)
Install Rosetta from the terminal with:
```shell
softwareupdate --install-rosetta
```
LibOMP (Apple Silicon only)
Apple Silicon does not ship `libomp` by default. It will need to be installed manually for some features of the ML toolkit to work. The `libomp` library can be installed from [homebrew](https://brew.sh/).
Check if Homebrew is installed by running the following command:
```shell
brew --version
```
If Homebrew is not installed, install it by running:
```shell
/bin/bash -c "$(curl -fsSL https://raw.githubusercontent.com/Homebrew/install/HEAD/install.sh)"
```
Or follow the instructions [here](https://brew.sh/).
To install LibOMP, run the following command:
```shell
brew install libomp
```
VcXsrv (Windows Subsystem for Linux only)
Since a WSL installation is headless by default (i.e., there is only access to a terminal running a Linux distribution) there are additional steps required to display visualizations. A more detailed tutorial is found, [here](https://medium.com/@shaoyenyu/make-matplotlib-works-correctly-with-x-server-in-wsl2-9d9928b4e36a).
- Dynamically export the DISPLAY environment variable in WSL2:
```shell
# add to the end of ~/.bashrc file
export DISPLAY=$(cat /etc/resolv.conf | grep nameserver | awk '{print $2}'):0
# source the file
source ~/.bashrc
```
- Download and install [VcXsrv](https://sourceforge.net/projects/vcxsrv/)
- When running the program is important to check "Disable access control"
After this, `VcXsrv` should be running successfully, and the machine is ready to proceed with the terminal installation.
Alternatives to `VcXsrv` include:
- [GWSL](https://opticos.github.io/gwsl/)
- [Xming](https://xming.en.softonic.com/)
- [Wayland](https://wayland.freedesktop.org/docs/html/)
GTK toolchains (Linux only)
GTK is a window extension that is used to display interactive charts and tables. The library responsible for interactive charts and tables (`pywry`) requires certain dependencies, based on the Linux distribution, to be installed first.
Debian-based / Ubuntu / Mint
```shell
sudo apt install libwebkit2gtk-4.0-dev
```
Arch Linux / Manjaro
```shell
sudo pacman -S webkit2gtk
```
Fedora
```shell
sudo dnf install gtk3-devel webkit2gtk3-devel
```
Read about Conda, Poetry and Python package management
For the best user experience we advise using `conda` and `poetry` for environment setup and dependency management. Conda ships binaries for packages like `numpy` so these dependencies are not built from source locally by `pip`. Poetry solves the dependency tree in a way that the dependencies of dependencies of dependencies use versions that are compatible with each other.
For `Conda` environments, the `build/conda` folder contains multiple `.yaml` configuration files to choose from.
When using other Python distributions we highly recommend a virtual environment like `virtualenv` or `pyenv` for installing the terminal dependency libraries.
For people who prefer using "vanilla" `pip` the requirements files are found in the project root:
- `requirements.txt` list main dependencies
- `requirements-full.txt` list all the dependencies including Machine Learning and Portfolio Optimization libraries and dependencies for developers
They can be installed with `pip`:
```shell
pip install -r requirements.txt
```
The dependency tree is solved by poetry.
Note: The libraries specified in the requirements files have been tested and work for the purpose of this project, however, these may be older versions. Hence, it is recommended for the user to set up a Python virtual environment prior to installing them. This keeps dependencies required by different projects in separate places.
After installing the requirements, install the terminal with:
```shell
pip install .
```