mirror of
https://github.com/OpenBB-finance/OpenBB.git
synced 2026-11-02 23:41:27 +00:00

459 lines
22 KiB
Markdown
Vendored
459 lines
22 KiB
Markdown
Vendored
# OpenBB Terminal
|
|
|
|
<!-- TABLE OF CONTENTS -->
|
|
<details open="open">
|
|
<summary><h2 style="display: inline-block">Table of Contents</h2></summary>
|
|
<ol>
|
|
<li><a href="#Anaconda---Python">Anaconda & Python Installation</a></li>
|
|
<li><a href="#Docker-Installation">Docker Installation</a></li>
|
|
<li><a href="#web-ui---docker">Docker Web UI Installation</a></li>
|
|
<li><a href="#local-installation-of-gst-on-raspberry-pi">Raspberry-Pi-Installation - Portable GST</a></li>
|
|
<li><a href="#api-keys">API Keys</a></li>
|
|
</ol>
|
|
</details>
|
|
|
|
---
|
|
|
|
There are currently four options to install the terminal:
|
|
|
|
- using Installer: recommended if you just want to use the terminal
|
|
- using Python: recommended if you want to develop new features
|
|
- using Docker: alternative option to the installer if preferred
|
|
- using Docker Web UI: if you want to deploy the web UI for users to access over your LAN
|
|
|
|
First step in all options is to star the project
|
|
|
|
<img width="1272" alt="Github starts" src="https://user-images.githubusercontent.com/25267873/115989986-e20cfe80-a5b8-11eb-8182-d6d87d092252.png">
|
|
|
|
## Anaconda & Python
|
|
|
|
This installation type supports both Windows and Unix systems (Linux + MacOS). However, on Windows it can become messy
|
|
so it is easier to use Windows Subsystem Linux (WSL) on this operating system. WSL emulates a Linux machine inside your
|
|
Windows system.
|
|
|
|
If you are using macOS or other Linux operating systems you can jump the next section
|
|
<a href="#installing-the-terminal">Installing the terminal</a>.
|
|
|
|
### Installing WSL (Only for Windows users)
|
|
|
|
If you are using Windows you first you need to install WSL. The process is simple and a tutorial can be found [here](https://www.sitepoint.com/wsl2/).
|
|
Once you reach the section **Update Linux** on that tutorial, you should have a linux machine installed and can proceed
|
|
to the next steps.
|
|
|
|
Since WSL installation is headless by default (i.e., you have only access to a terminal running a linux distribution)
|
|
you need some extra steps to be able to visualize the charts produced by the terminal (more detailed tutorial [here](https://medium.com/@shaoyenyu/make-matplotlib-works-correctly-with-x-server-in-wsl2-9d9928b4e36a)):
|
|
|
|
1. Dynamically export the DISPLAY environment variable in WSL2:
|
|
|
|
```bash
|
|
# add to the end of ~/.bashrc file
|
|
export DISPLAY=$(cat /etc/resolv.conf | grep nameserver | awk '{print $2}'):0
|
|
# source the file
|
|
source ~/.bashrc
|
|
```
|
|
|
|
2. Download and install [VcXsrv](https://sourceforge.net/projects/vcxsrv/)
|
|
3. When running the program is important to check "Disable access control"
|
|
|
|
After this, `VcXsrv` should be running successfully and we can proceed to terminal installation.
|
|
|
|
Although we **extremely** recommend using WSL to run the terminal on windows, if you don't want or can't for some reason,
|
|
you can try install the terminal directly on Windows without WSL. If you'd like to see a video recording of the
|
|
installation on Windows without WSL, @JohnnyDankseed has made one available [here](https://www.youtube.com/watch?v=-DJJ-cfquDA).
|
|
|
|
### Installing the terminal
|
|
|
|
These steps are common in all operating systems (Windows with or without WSL, MacOS or Linux).
|
|
|
|
This project supports Python 3.8 and 3.9. By default, the newly created virtual environment will use Python 3.8.13
|
|
|
|
Our current recommendation is to use this project with Anaconda's Python distribution - either full
|
|
[**Anaconda3 Latest**](https://www.anaconda.com/products/distribution) or
|
|
[**Miniconda3 Latest**](https://docs.conda.io/en/latest/miniconda.html) (recommended).
|
|
Several features in this project utilize Machine Learning. Machine Learning Python dependencies are optional. For MacOS systems, the "Miniconda3 MacOSX 64-bit" version that works on both Intel and M1
|
|
macs is recommended.
|
|
|
|
1. [Install Anaconda](https://docs.anaconda.com/anaconda/install/index.html) (It's on the AUR as anaconda or miniconda3!)
|
|
|
|
- Follow the instructions specified on the website above:
|
|
|
|
- If you are using macOS click [Installing on MacOS](https://docs.anaconda.com/anaconda/install/mac-os/)
|
|
- If you are using WSL or Linux click [Installing on Linux](https://docs.anaconda.com/anaconda/install/linux/)
|
|
- If you are using Windows click [Installing on Windows](https://docs.anaconda.com/anaconda/install/windows/).
|
|
**ONLY REQUIRED IF NOT USING WSL**, you also need to install/update Microsoft C++ Build Tools from here: <https://visualstudio.microsoft.com/visual-cpp-build-tools/>
|
|
|
|
- After following the steps, confirm that you have it by opening a terminal and running: `conda -V`. The output
|
|
should be something along the lines of: `conda 4.11.0`
|
|
|
|
2. Install git
|
|
|
|
```bash
|
|
conda install -c anaconda git
|
|
```
|
|
|
|
**For Linux users only, run these additional commands:**
|
|
|
|
```bash
|
|
sudo apt update
|
|
sudo apt install -y cmake gcc
|
|
pip install cmake
|
|
```
|
|
|
|
3. Clone the Project
|
|
|
|
- Via HTTPS: `git clone https://github.com/OpenBB-finance/OpenBBTerminal.git`
|
|
- via SSH: `git clone git@github.com:OpenBB-finance/OpenBBTerminal.git`
|
|
|
|
4. Navigate into the project's folder
|
|
|
|
```bash
|
|
cd OpenBBTerminal/
|
|
```
|
|
|
|
5. Create Environment
|
|
|
|
You can name the environment whatever you want. Although you could use names such as: `welikethestock`, `thisistheway`
|
|
or `diamondhands`, we recommend something simple and intuitive like `gst`. This is because this name will be used
|
|
from now onwards.
|
|
|
|
```bash
|
|
conda env create -n gst --file build/conda/conda-3-8-env.yaml
|
|
```
|
|
|
|
6. Activate the virtual environment
|
|
|
|
```bash
|
|
conda activate gst
|
|
```
|
|
|
|
Note: At the end, you can deactivate it with: `conda deactivate`.
|
|
|
|
7. Install dependencies with poetry
|
|
|
|
Install the main dependencies with
|
|
|
|
```bash
|
|
poetry install
|
|
```
|
|
|
|
To enable the `prediction` menu install additional dependencies after installing main dependencies:
|
|
|
|
- On Intel and M1 macs
|
|
|
|
```bash
|
|
conda install -c conda-forge tensorflow==2.7.1
|
|
conda install -c pytorch u8darts-torch
|
|
poetry install -E prediction
|
|
```
|
|
|
|
- On all other systems
|
|
|
|
```bash
|
|
conda install -c pytorch u8darts-torch
|
|
poetry install -E prediction
|
|
```
|
|
|
|
If you are having trouble with Poetry (e.g. on a Windows system), simply install requirements.txt with pip
|
|
|
|
```bash
|
|
pip install -r requirements.txt
|
|
```
|
|
|
|
8. You're ready to use the terminal!
|
|
|
|
```bash
|
|
python terminal.py
|
|
```
|
|
|
|
9. (Windows - Optional and **only if you are not using WSL**) Speeding up opening process in the future
|
|
|
|
After you've installed OpenBB Terminal, you'll find a file named "OpenBB Terminal.bat". You can use this file
|
|
to open OpenBB Terminal quicker. This file can be moved to your desktop if you'd like. If you run into issues
|
|
while trying to run the batch file. If you run into issues with the batch files, edit the file and check to see if
|
|
the directories match up. This file assumes you used the default directories when installing.
|
|
|
|
10. Jupyter Lab (Optional. Early alpha). User the Terminal from Jupyter Lab
|
|
|
|
You can install Jupyter Lab extensions that help you manage settings and launch the terminal in a JL bash console
|
|
using the commands in the [jupyterlab/README.md](../jupyterlab/README.md)
|
|
|
|
**NOTE:** When you close the terminal and re-open it, the only command you need to re-call is `conda activate gst`
|
|
before you call `python terminal.py` again.
|
|
|
|
**TROUBLESHOOT:** If you are having troubles to install, check our _newest_
|
|
<a href="https://github.com/OpenBB-finance/OpenBBTerminal/blob/master/TROUBLESHOOT.md">
|
|
<strong>troubleshoot page</strong></a>. You can also reach for help on our [discord](https://discord.gg/Up2QGbMKHY).
|
|
|
|
## Advanced User Install - Machine Learning
|
|
|
|
If you are an advanced user and use other Python distributions, we have several requirements.txt documents that you can
|
|
pick from to download project dependencies.
|
|
|
|
If you are using conda instead of build/conda/conda-3-8-env.yaml configuration file in Step 5, use build/conda/conda-3-8-env-full.
|
|
|
|
Note: The libraries specified in the [requirements.txt](/requirements.txt) file have been tested and work for
|
|
the purpose of this project, however, these may be older versions. Hence, it is recommended for the user to set up
|
|
a virtual python environment prior to installing these. This allows to keep dependencies required by different projects
|
|
in separate places.
|
|
|
|
_If you would like to use optional Machine Learning features:_
|
|
|
|
- Update your [feature_flags.py](/openbb_terminal/feature_flags.py) with:
|
|
|
|
```bash
|
|
ENABLE_PREDICT = os.getenv("OPENBB_ENABLE_PREDICT") or True
|
|
```
|
|
|
|
- Install optional ML features dependencies:
|
|
|
|
```bash
|
|
poetry install -E prediction
|
|
```
|
|
|
|
\*\*NOTE: For MacOS users should use this method instead of the poetry command
|
|
|
|
```bash
|
|
conda install -c conda-forge tensorflow==2.7.0
|
|
```
|
|
|
|
- Ready to launch:
|
|
|
|
```python
|
|
python terminal.py
|
|
```
|
|
|
|
## Update Terminal
|
|
|
|
The terminal is constantly being updated with new features and bug fixes, hence, for your terminal to be update,
|
|
you can run:
|
|
|
|
```bash
|
|
git pull
|
|
```
|
|
|
|
to get the latest changes.
|
|
|
|
If this fails due to the fact that you had modified some python files, and there's a conflict with the updates, you can use:
|
|
|
|
```bash
|
|
git stash
|
|
```
|
|
|
|
Then, re-run `poetry install` or `pip install -r requirements.txt` to get any new dependencies.
|
|
|
|
Once installation is finished, you're ready to openbb.
|
|
|
|
If you `stashed` your changes previously, you can un-stash them with:
|
|
|
|
```bash
|
|
git stash pop
|
|
```
|
|
|
|
## Docker Installation
|
|
|
|
1. Make sure docker desktop is installed. Install links can be found [here](https://www.docker.com/products/docker-desktop).
|
|
To confirm that your docker desktop is downloaded and running, open a command prompt or terminal and enter
|
|
`docker info`. If you get the following you are not running the docker desktop:
|
|
|
|
```text
|
|
Server:
|
|
ERROR: Cannot connect to the Docker daemon at unix:///var/run/docker.sock.
|
|
Is the docker daemon running?
|
|
```
|
|
|
|
Open the docker desktop app in this case.
|
|
|
|
2. Download the latest docker image.
|
|
|
|
```bash
|
|
docker pull ghcr.io/openbb-finance/openbbterminal-poetry:latest
|
|
```
|
|
|
|
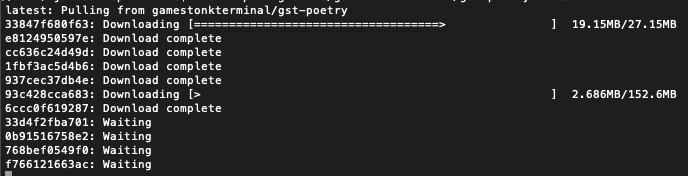
Upon running this the first time, you should see the various layers downloading (note the random series of letters
|
|
numbers will vary). The first time this is run, it will take a few minutes. Subsequent updates will be much faster,
|
|
as the changes will be in the MB instead of GB.
|
|
|
|
|
|
|
|
Once the download is complete, confirm that the image has been created by doing `docker images`. You should see
|
|
something similar to
|
|
|
|
```text
|
|
REPOSITORY TAG IMAGE ID CREATED SIZE
|
|
ghcr.io/openbb-finance/openbbterminal-poetry latest b1409a304750 42 hours ago 2.29GB
|
|
```
|
|
|
|
3. Run a container
|
|
|
|
You are now ready to run the terminal (every time you want to use the terminal you need to run this command):
|
|
|
|
`docker run -it --rm ghcr.io/openbb-finance/openbbterminal-poetry:latest`
|
|
|
|
This will open up the terminal in your command prompt or terminal. Note that this has provided now environment file,
|
|
so you will not be able to view plots or use keys at this stage.
|
|
|
|
At this point, you should be able to use the majority of the features using Docker. To read more on adding the
|
|
environment keys and how to configure your X-server to show plots, hop over to the
|
|
[Advanced Docker Setup](/DOCKER_ADVANCED.md).
|
|
|
|
## Web UI - Docker
|
|
|
|
1. Ensure Docker is installed.
|
|
2. Navigate to the location of the Dockerfile in the repo (`cd openbb_terminal_web`)
|
|
3. Ensure the launcher is executable with `chmod +x ./launch`
|
|
4. Launch it with `./launch`. If you get a permission denied error, do `sudo ./launch` instead
|
|
5. Once it's launched, you will be able to access it by going to `http://host-ip:8080` in a browser, or
|
|
`http://localhost:8080` if you are running it on your local machine.
|
|
|
|
For API keys, create the `setenv` file if it doesn't already exist.
|
|
It will automatically get created on the first launch, and won't get committed to Git because it is on the `.gitignore`.
|
|
Set the API keys [as explained here](https://github.com/OpenBB-finance/OpenBBTerminal/blob/main/DOCKER_ADVANCED.md#environment-variables).
|
|
Once you've put the API keys in that file, re-run the launch script, and it will use your API keys.
|
|
There are a few things that still don't work, and you can see what works and what doesn't [here](https://github.com/CoconutMacaroon/OpenBBTerminal/blob/main/openbb_terminal_web/README.md#todo).
|
|
|
|
## Local Installation of GST on Raspberry Pi
|
|
|
|
1. Running raspbian lite(headless) or desktop (both 64bit) we should first start off with an update/upgrade.
|
|
|
|
```bash
|
|
sudo apt update && sudo apt upgrade
|
|
```
|
|
|
|
Once completed reboot and lets reopen.
|
|
|
|
2. [Install Miniforge](https://github.com/conda-forge/miniforge) The community version of anaconda/miniconda that has
|
|
Arm support.
|
|
|
|
- Follow the on screen prompts to install miniforge(conda).
|
|
|
|
```bash
|
|
wget https://github.com/conda-forge/miniforge/releases/latest/download/Miniforge3-Linux-aarch64.sh
|
|
```
|
|
|
|
- After following the steps, confirm that you have it by opening a terminal and running: `conda -V`. The output
|
|
should be something along the lines of: `conda 4.9.2`
|
|
|
|
3. Install git
|
|
|
|
```bash
|
|
conda install -c anaconda git
|
|
```
|
|
|
|
4. Install Cmake
|
|
|
|
```bash
|
|
sudo apt update
|
|
sudo apt install -y cmake
|
|
pip install cmake
|
|
```
|
|
|
|
5. Clone the Project
|
|
|
|
- Via HTTPS: `git clone https://github.com/OpenBB-finance/OpenBBTerminal.git`
|
|
- via SSH: `git clone git@github.com:OpenBB-finance/OpenBBTerminal.git`
|
|
|
|
6. Navigate into the project's folder
|
|
|
|
```bash
|
|
cd OpenBB/
|
|
```
|
|
|
|
7. Create Environment
|
|
|
|
You can name the environment whatever you want. Although you could use names such as: `welikethestock`, `thisistheway`
|
|
or `diamondhands`, we recommend something simple and intuitive like `gst`. This is because this name will be used
|
|
from now onwards.
|
|
|
|
```bash
|
|
conda env create -n openbb python=3.8.13
|
|
```
|
|
|
|
8. Activate the virtual environment
|
|
|
|
```bash
|
|
conda activate openbb
|
|
```
|
|
|
|
Note: At the end, you can deactivate it with: `conda deactivate`.
|
|
|
|
9. Update all poetry dependencies
|
|
|
|
```bash
|
|
poetry update --lock
|
|
```
|
|
|
|
Note: This is done to solve any issues with poetry dependencies for the arm architecture of the rpi
|
|
|
|
10. Install using our updated poetry installation
|
|
|
|
```bash
|
|
poetry install
|
|
```
|
|
|
|
11. Ready to rock on a Raspbery Pi!
|
|
|
|
```bash
|
|
python terminal.py
|
|
```
|
|
|
|
Note: For a headless installation using raspbian lite also follow the Jupyter Lab installation
|
|
|
|
12. Jupyter Lab (Optional. Early alpha). User the Terminal from Jupyter Lab
|
|
|
|
You can install Jupyter Lab extensions that help you manage settings and launch the terminal in a JL bash console
|
|
using the commands in the [jupyterlab/README.md](jupyterlab/README.md)
|
|
|
|
**NOTE:** When you close the terminal and re-open it, the only command you need to re-call is `conda activate gst`
|
|
before you call `python terminal.py` again.
|
|
|
|
### API Keys
|
|
|
|
The project is build around several different API calls, whether it is to access historical data or financials.
|
|
The table below shows the ones where a key is necessary. The easiest way is of updating the keys is by using the
|
|
terminal, see [this guide](https://openbb-finance.github.io/OpenBBTerminal/terminal/#accessing-other-sources-of-data-via-api-keys).
|
|
|
|
You can also use the environment variable to set your API Keys directly instead of using the Terminal, for the variable
|
|
name in the code one just needs to remove the "GT\_", this can be found in [config_terminal.py](/openbb_terminal/config_terminal.py).
|
|
|
|
| Website | Environment Variables |
|
|
| :--------------------------------------------------------------------------------- | :-------------------------------------------------------------------------------------------------------------------------------------------------------------------- |
|
|
| [Alpha Vantage](https://www.alphavantage.co) | OPENBB_API_KEY_ALPHAVANTAGE |
|
|
| [Binance](https://binance.com) | OPENBB_API_BINANCE_KEY <br/> OPENBB_API_BINANCE_SECRET |
|
|
| [BitQuery](https://bitquery.io/pricing) | OPENBB_API_BITQUERY_KEY |
|
|
| [Coinbase](https://docs.pro.coinbase.com/) | OPENBB_API_COINBASE_KEY <br/> OPENBB_API_COINBASE_SECRET <br/> OPENBB_API_COINBASE_PASS_PHRASE |
|
|
| [Coinglass](https://coinglass.github.io/API-Reference/#api-key) | OPENBB_API_COINGLASS_KEY |
|
|
| [CoinMarketCap](https://coinmarketcap.com) | OPENBB_API_CMC_KEY <br/> |
|
|
| [Cryptopanic](https://cryptopanic.com/developers/api/) | OPENBB_API_CRYPTO_PANIC_KEY |
|
|
| [DEGIRO](https://www.degiro.fr) | OPENBB_DG_USERNAME <br/> OPENBB_DG_PASSWORD <br/> OPENBB_DG_TOTP_SECRET |
|
|
| [Ethplorer](https://github.com/EverexIO/Ethplorer/wiki/Ethplorer-API) | OPENBB_API_ETHPLORER_KEY |
|
|
| [Financial Modeling Prep](https://financialmodelingprep.com) | OPENBB_API_KEY_FINANCIALMODELINGPREP |
|
|
| [Finnhub](https://finnhub.io) | OPENBB_API_FINNHUB_KEY |
|
|
| [FRED](https://fred.stlouisfed.org) | OPENBB_API_FRED_KEY |
|
|
| [GitHub](https://docs.github.com/en/rest/guides/getting-started-with-the-rest-api) | OPENBB_API_GITHUB_KEY |
|
|
| [Glassnode](https://docs.glassnode.com/basic-api/api-key#how-to-get-an-api-key) | OPENBB_API_GLASSNODE_KEY |
|
|
| [News](https://newsapi.org) | OPENBB_API_NEWS_TOKEN |
|
|
| [Oanda](https://developer.oanda.com) | OPENBB_OANDA_TOKEN <br/> OPENBB_OANDA_ACCOUNT |
|
|
| [Polygon](https://polygon.io) | OPENBB_API_POLYGON_KEY |
|
|
| [Quandl](https://www.quandl.com) | OPENBB_API_KEY_QUANDL |
|
|
| [Reddit](https://www.reddit.com) | OPENBB_API_REDDIT_CLIENT_ID <br> OPENBB_API_REDDIT_CLIENT_SECRET <br/> OPENBB_API_REDDIT_USERNAME <br/> OPENBB_API_REDDIT_USER_AGENT <br/> OPENBB_API_REDDIT_PASSWORD |
|
|
| [SentimentInvestor](https://sentimentinvestor.com) | OPENBB_API_SENTIMENTINVESTOR_TOKEN <br> OPENBB_API_SENTIMENTINVESTOR_KEY |
|
|
| [Tradier](https://developer.tradier.com) | OPENBB_TRADIER_TOKEN |
|
|
| [Twitter](https://developer.twitter.com) | OPENBB_API_TWITTER_KEY <br/> OPENBB_API_TWITTER_SECRET_KEY <br/> OPENBB_API_TWITTER_BEARER_TOKEN |
|
|
| [Whale Alert](https://docs.whale-alert.io/) | OPENBB_API_WHALE_ALERT_KEY |
|
|
|
|
Example:
|
|
|
|
```bash
|
|
export OPENBB_API_REDDIT_USERNAME=SexyYear
|
|
```
|
|
|
|
Environment variables can also be set in a `.env` file at the top of the repo. This file is ignored by git so your API
|
|
keys will stay secret. The above example stored in `.env` would be:
|
|
|
|
```bash
|
|
OPENBB_API_REDDIT_USERNAME=SexyYear
|
|
```
|
|
|
|
Note that the `OPENBB_API_REDDIT_USER_AGENT` is the name of the script that you set when obtained the Reddit API key.
|
|
Note that it is not necessary to have a valid Alpha Vantage key to get daily OHLC values.
|